Tutorial Integrate Founder HQ dengan SPX Express
Step 1: Ambil API dari SPX
Pergi ke dashboard SPX Express (Shopee Express panel)
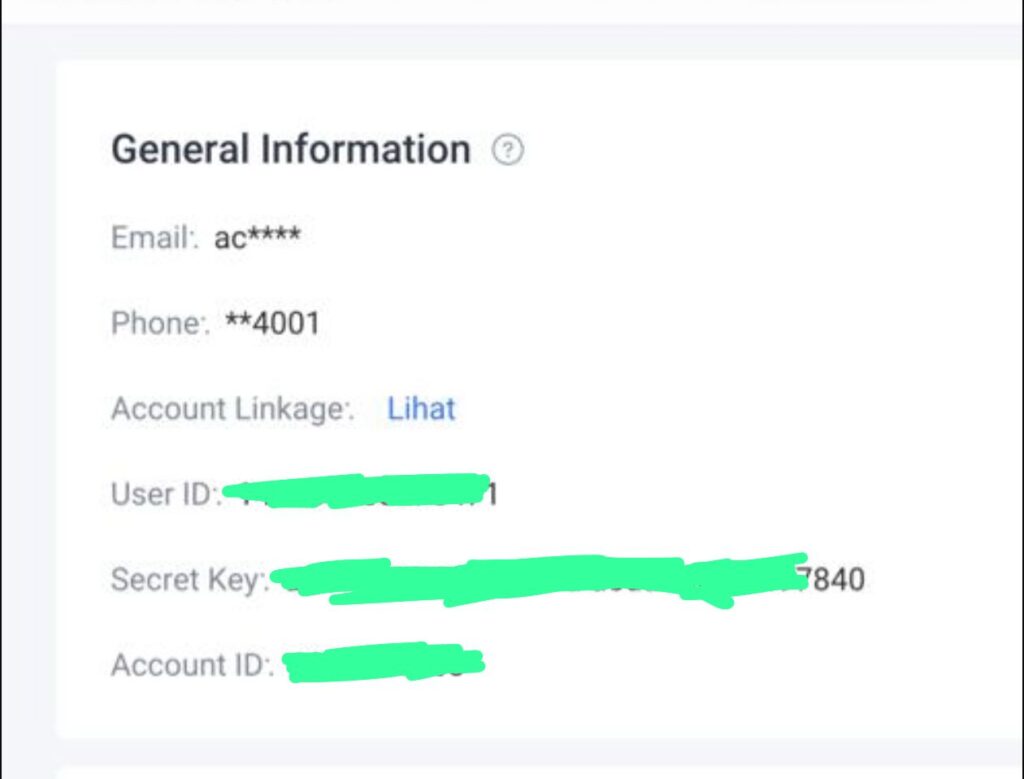
Dalam bahagian General Information, ambil:
- User ID
- Secret Key
Penting:
- Jangan ambil Account ID
- Founder HQ hanya guna:
→ User ID
→ Secret Key
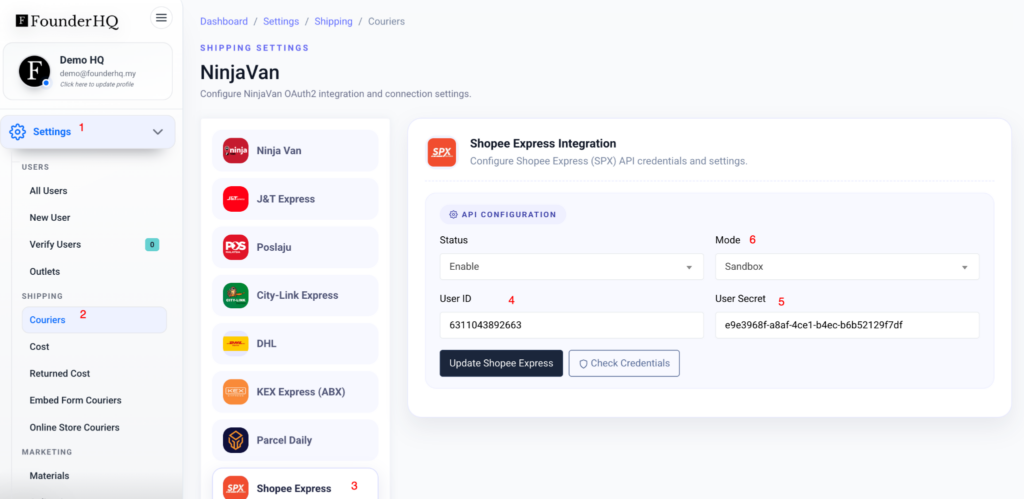
Step 2: Masuk Founder HQ
Path:
Settings → Shipping → Couriers → Shopee Express
Isi:
- Status → Enable
- Mode → Sandbox (testing) / Production (live)
- User ID → paste dari SPX
- User Secret → paste dari SPX
Lepas isi:
- Klik Check Credentials (untuk verify)
- Klik Update Shopee Express
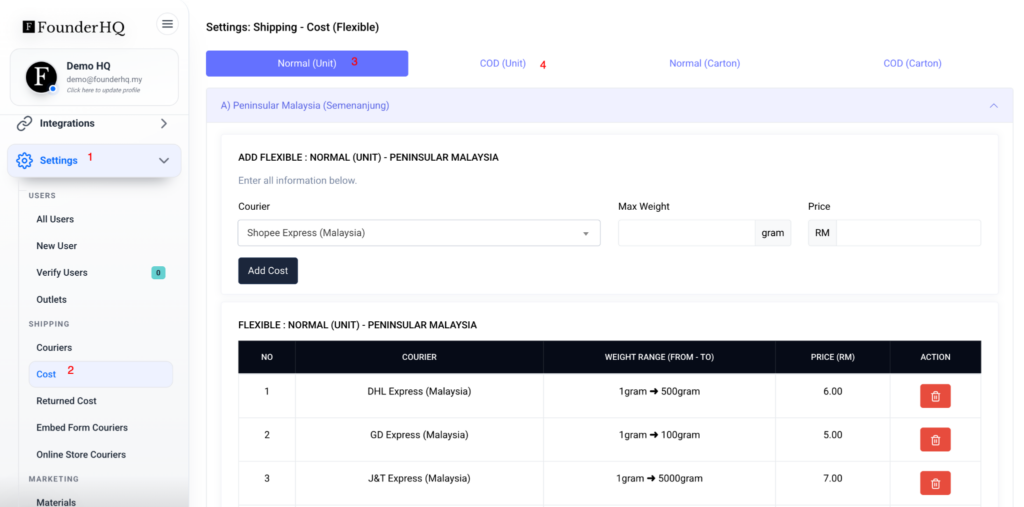
Step 3: Setup Shipping Cost
Pergi:
Settings → Shipping → Cost
Setup ikut keperluan:
- Normal (Unit)
- COD (Unit)
- Normal (Carton)
- COD (Carton)
Isi:
- Courier: Shopee Express
- Weight range
- Price (RM)
Ini penting supaya sistem boleh kira shipping dengan betul
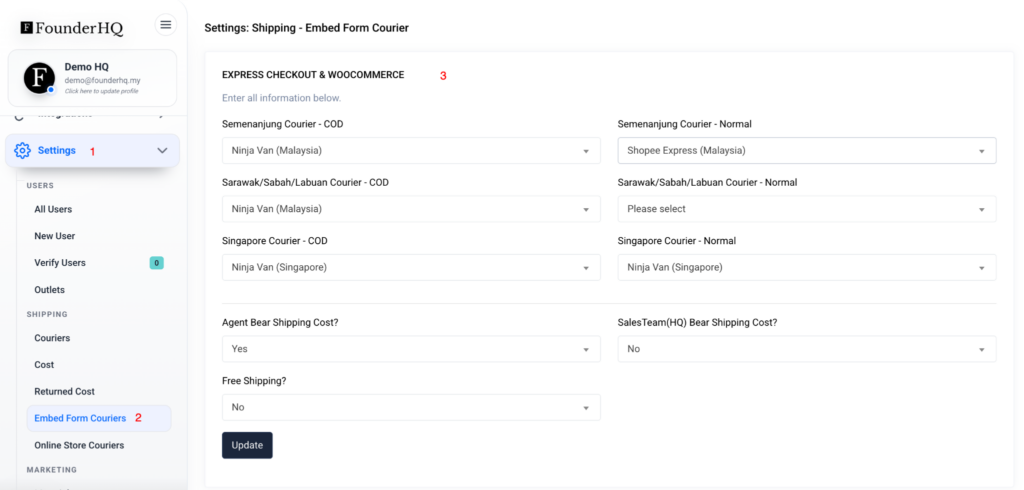
Step 4: Set Courier untuk Checkout (Jika order dari Woocommerce, terus auto set kepada SPX)
Pergi:
Settings → Shipping → Embed Form Couriers
Set:
- Semenanjung Courier – Normal → Shopee Express
- Semenanjung Courier – COD → ikut pilihan (contoh NinjaVan / SPX jika support)
Optional:
- Agent Bear Shipping Cost → Yes/No
- Sales Team Bear Shipping Cost → Yes/No
- Free Shipping → Yes/No
Ini akan reflect dekat checkout form atau WooCommerce
Step 5: Testing
Sebelum guna live:
- Set Mode = Sandbox
- Create dummy order
- Try generate AWB
Kalau semua ok:
- Tukar Mode ke Production
Common Mistake
- Ambil Account ID (salah)
- Tak klik Check Credentials
- Tak setup shipping cost
- Mode masih Sandbox tapi expect live
Flow Ringkas
SPX API connect (User ID + Secret)
→ Founder HQ detect courier
→ Shipping cost apply
→ Order masuk
→ Generate AWB